How to Wrap Products in Tissue Paper: A Business Guide
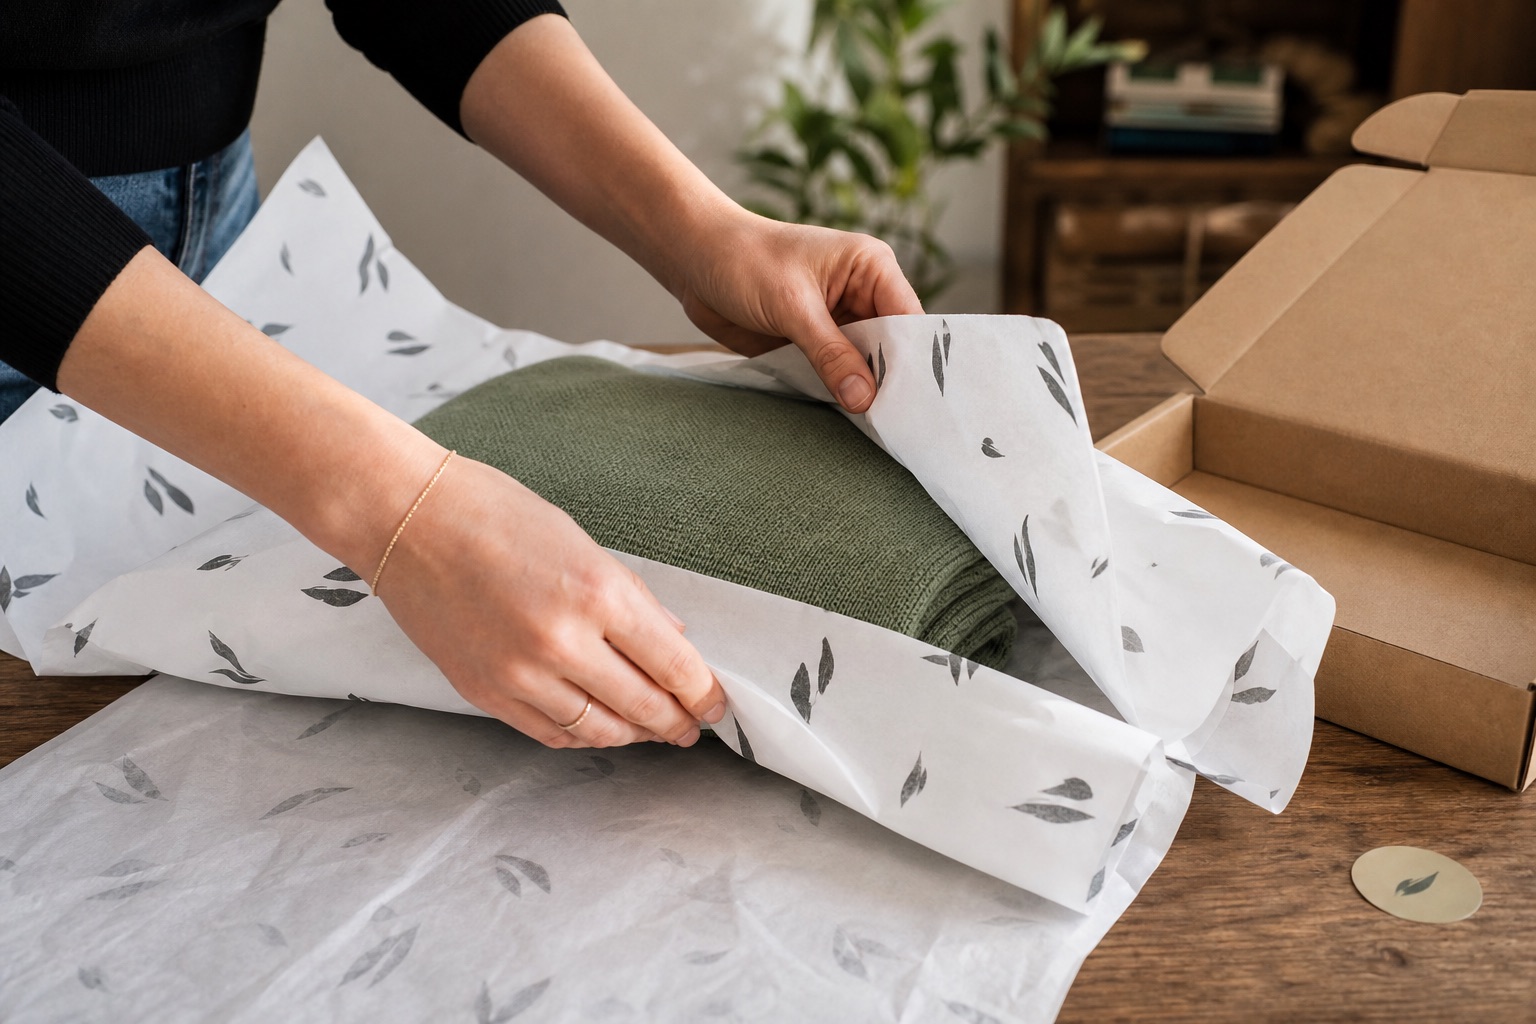
Good tissue-paper wrapping should be easy to repeat at 4pm on a busy Monday, not only when the creative director packs one perfect sample for a photograph.
For a business, the best method balances:
- Presentation.
- Product coverage.
- Packing speed.
- Material use.
- Transit requirements.
- Consistency between staff.
This guide explains five useful wrapping methods and how to turn one of them into a reliable packing standard. Tissue is excellent for presentation and light surface separation, but it is not structural cushioning. Fragile or heavy products still need suitable protective packaging around the tissue-wrapped item.
Prepare the packing station
Before teaching a fold, remove friction from the bench.
Keep within easy reach:
- Tissue in the correct size.
- The products or packed product units.
- The closing sticker or paper seal.
- The final mailer or box.
- Any required protective insert.
- A clean, dry work surface.
- One approved finished example.
Store tissue flat. Crushed corners and curled stacks slow the packer before wrapping begins. Keep drinks, fragrance oils, food and dirty tools away from the paper.
If several sizes are stocked, label their storage positions clearly. Staff using a large sheet because the small stack is two steps away can quietly add thousands of unnecessary sheets to annual consumption.
Choose the right side and orientation
Printed tissue may have a more visible print side. Place the side you want the customer to see facing down before wrapping; it will become the exterior when the folds close.
Check:
- The logo direction.
- Where the final seam will sit.
- Whether a large mark will be hidden under the product.
- Which face the customer sees first.
A small, non-directional repeat is forgiving. A large centred logo demands a more controlled product position.
Method 1: the envelope fold
The envelope fold suits folded clothing, books, rectangular cartons, stationery and many ecommerce products.
Steps
- Lay one sheet flat with the presentation side facing down.
- Position the product slightly below the centre, with its longest edge parallel to the sheet's longest edge.
- Bring the lower edge up and over the product.
- Fold the left and right sides inward, creating clean vertical edges.
- Bring the upper section down over the parcel.
- Close with a small sticker where the final flap overlaps.
- Place the seam upward if it is part of the unboxing view, or downward for a cleaner top surface.
What makes it work
The sheet needs enough width to travel around product height and overlap at both sides. The final flap should close without pulling. Tension causes tissue to split at corners.
Use the tissue paper sizing guide to calculate a starting size.
Common problems
Bulky ends: The sheet is too wide or the side folds are not creased before closing.
Exposed product: The sheet is too small or the product was placed too high.
Tearing at corners: The wrap is too tight, the item has sharp corners or the paper needs more body.
Crooked logo: The product was not aligned to the pattern before the first fold.
Method 2: the box-liner fold
This method makes opening a mailer feel considered. Tissue lines the base, rises up the sides and folds across the product.
Steps
- Centre the sheet over the open empty box.
- Lower it gently into the base rather than pushing hard into every corner.
- Create light folds where the paper meets the sides.
- Place the product and any required protective components inside.
- Fold the side flaps over the product.
- Fold the front flap, then the rear flap, so the final edge faces the customer.
- Add a sticker only if it improves control; a clean tuck may be sufficient.
What makes it work
The sheet must cover the internal base and travel up the box depth. If the flaps need to cross, extra width is required.
The liner should not prevent the lid closing freely. If paper compresses the product, choose a thinner sheet, smaller fold or deeper box.
Best for
- Subscription boxes.
- Cosmetics sets.
- Jewellery mailers.
- Gift boxes.
- Multi-item ecommerce orders.
Limitations
The tissue does not stop products moving inside an oversized box. Use fitted inserts or appropriate void fill for movement control.
Method 3: the rolled wrap
The rolled wrap is efficient for cylindrical items, rolled textiles and grouped narrow products.
Steps
- Place the tissue flat with one corner or short edge pointing toward you.
- Position the item close to that edge.
- Roll the item forward, keeping light even tension.
- Stop when the tissue overlaps by at least a few centimetres.
- Fold or tuck the ends depending on the product shape.
- Secure the seam with one small seal if needed.
Best for
- Bottles already protected in retail cartons.
- Rolled scarves.
- Posters inside rigid tubes before final packing.
- Bundles of slim boxes.
Avoid
Do not twist tissue tightly around unprotected glass or use it as the only transit protection. Twisted ends can also look like confectionery packaging, which may be wrong for the brand.
Method 4: the diagonal fold
The diagonal fold creates interesting angles and works well when the sheet is only slightly larger than the product.
Steps
- Rotate the sheet so it appears as a diamond.
- Place the product across the centre.
- Bring the bottom corner over the product.
- Fold the left and right corners inward.
- Roll or fold the product toward the upper corner.
- Tuck or seal the final point.
Best for
- Small boxes.
- Books and notebooks.
- Flat accessories.
- Retail purchases packed at a counter.
Watch the pattern
A directional logo can appear rotated. Test the final view before using this method across a printed run.
Method 5: the gathered liner
Gathered tissue adds softness around a small product inside a bag or box. It should look controlled rather than like emergency void fill.
Steps
- Place one or two sheets at a slight angle.
- Lower the centre into the box or bag.
- Place the product in the centre.
- Bring the tissue upward around the sides.
- Adjust four or five intentional peaks.
- Trim or change sheet size if there is excessive volume.
Best for
- Small gifts.
- Ceramics with separate protective packaging.
- Retail bags.
- Hampers.
Material warning
Gathering consumes more paper than a flat wrap and can hide the product. Measure its value against cost and packing time. It is usually a presentation layer, not reliable cushioning.
Wrapping folded clothing neatly
Standardise the garment fold first. If T-shirts arrive at the wrapping bench in different shapes, the tissue process cannot be consistent.
A useful sequence is:
- Fold the garment to the approved rectangle.
- Place it face down on the tissue if the reveal should show the front.
- Use the envelope method.
- Keep side folds parallel to the garment.
- Close with one seal.
- Place it into the mailer seam-side down or according to the approved reveal.
Avoid over-tight wrapping. Knitwear compresses, then expands against the tissue and can split it. Leave enough ease for the fabric.
For bulky garments, a larger single sheet is usually cleaner than patching two small sheets. For small accessories, a full 500 × 700mm sheet may be unnecessary.
Wrapping jewellery and small products
Place jewellery in its pouch, card or primary box before using tissue. Loose chains and earrings should not rely on paper to stay organised.
Use a small sheet and a compact envelope or diagonal fold. Large amounts of tissue can make a small item feel lost and increase movement inside the mailer.
Acid-free stock is a sensible baseline for jewellery contact layers, but long-term tarnish protection may require additional materials. Read what acid-free tissue means before making storage claims.
Wrapping candles, ceramics and glass
Treat tissue as the inner presentation layer:
- Make sure lids and components are secure.
- Wrap or line with tissue.
- Add the designed protective system.
- Place in a correctly sized outer box.
- Test for movement.
Do not keep adding tissue until an oversized box feels full. Use a fitted insert, corrugated structure or appropriate cushioning for the weight and fragility.
Fragranced and oily products should be tested against the paper. Oils can mark tissue, alter ink and transfer to neighbouring items.
Should the sticker go on the tissue?
A sticker can:
- Hold the final flap.
- Create a clear opening point.
- Add a second brand detail.
- Improve packing consistency.
It can also tear tissue, add cost and complicate recycling if the materials differ.
Use the smallest seal that works. Test peel strength. A highly aggressive adhesive can pull fibres and make the opening feel messy. If the fold holds naturally, a sticker may be unnecessary.
How to stop tissue tearing
Tears usually indicate a process problem.
Check:
- The sheet is large enough.
- Sharp product corners are covered or softened by primary packaging.
- Staff are not pulling the paper tight.
- Tissue is stored dry and flat.
- The paper weight suits the product.
- Hands and the bench are dry.
- The closing sticker is not too aggressive.
If tears occur in the same place, photograph them and inspect the fold. Changing the sequence may solve more than changing the paper.
How to use less tissue
Match sheet to product
The correct size avoids cutting and bunching.
Use one defined method
Improvisation creates inconsistent sheet use.
Keep protection separate
Do not use decorative tissue to compensate for a poorly fitted transit box.
Calculate actual consumption
Track average sheets per order. Our tissue paper quantity calculator guide provides worked formulas.
Remove unnecessary layers
If a product already has a retail carton, it may need a presentation wrap rather than a liner plus wrap plus top sheet.
Create a packing standard
An effective standard fits on one page and includes:
- Product category.
- Tissue size.
- Number of sheets.
- Fold name.
- Product orientation.
- Sticker position.
- Finished photograph.
- Exceptions.
Place it at the bench and include it in new-starter training. Keep the approved physical sample nearby for the first week.
Do not write “wrap nicely”. Describe actions that two people can repeat.
Measure packing time
Presentation matters, but labour is part of packaging cost.
Time ten packs using the proposed method. Start with tissue ready at the bench and stop when the wrapped product is inside the final box.
If one method adds 25 seconds to 500 daily orders, it adds more than three hours of labour each day. The slower method may still be worthwhile for a high-value product, but the trade-off should be visible.
Look for wasted motions:
- Walking to another stack.
- Searching for stickers.
- Cutting every sheet.
- Turning the product repeatedly.
- Re-folding misaligned paper.
A good bench layout can improve presentation and speed together.
Test the complete parcel
The wrap is not finished until the customer receives it.
Run:
- A drop and movement test appropriate to the product.
- A courier trial.
- A warm or humid exposure test when relevant.
- A light rub test for ink and product surfaces.
- An opening test by someone who did not pack it.
Ask the tester:
- Was the opening point obvious?
- Did the tissue remain intact?
- Was the product easy to remove?
- Did any colour or ink transfer?
- Was there unnecessary material?
- Did the box protect the product?
Tissue presentation cannot compensate for product damage.
Common wrapping mistakes
Using a sheet that is too large
Excess creates bulky corners and inconsistent folds.
Pulling the tissue tight
Tissue needs ease around height and sharp edges.
Hiding the print
Plan which side faces out and where the logo lands.
Treating tissue as cushioning
It provides light separation, not dependable shock absorption.
Changing the method between staff
Variation increases consumption and weakens brand consistency.
Adding decorative steps without measuring labour
Every sticker, fold and card has a time cost.
Packing oily or damp products
Products must be stable and suitable for paper contact.
Frequently asked questions
How many sheets should I use to wrap clothes?
One correctly sized sheet may wrap a small folded garment. Medium or bulky garments often use two lightweight sheets or one larger sheet. Test the actual fold and record average use.
Can tissue paper protect products in the post?
It protects presentation and provides light surface separation. Fragile, heavy or moving products need suitable structural and cushioning packaging as well.
Which side of printed tissue faces out?
Lay the desired exterior print side down before wrapping. After the folds close, that surface becomes visible.
How do I wrap without tape?
Use an envelope fold with a long final flap tucked beneath the parcel, or a controlled box-liner fold. Success depends on adequate overlap and a product that does not spring open.
Should I use one or two tissue sheets?
Use the minimum that achieves the approved wrap. Two may improve opacity, cover a larger item or create a liner plus top sheet. More is not automatically more premium.
The practical recommendation
Choose one method for each product family, test it across ten real orders and record sheet use, packing time and the finished result. Standardise tissue size and product orientation before adding decorative extras.
For most rectangular ecommerce products, start with the envelope fold. For mailer boxes, test a liner fold. Then choose your tissue size and build the printed specification online.