Custom Tissue Paper for Jewellery Brands
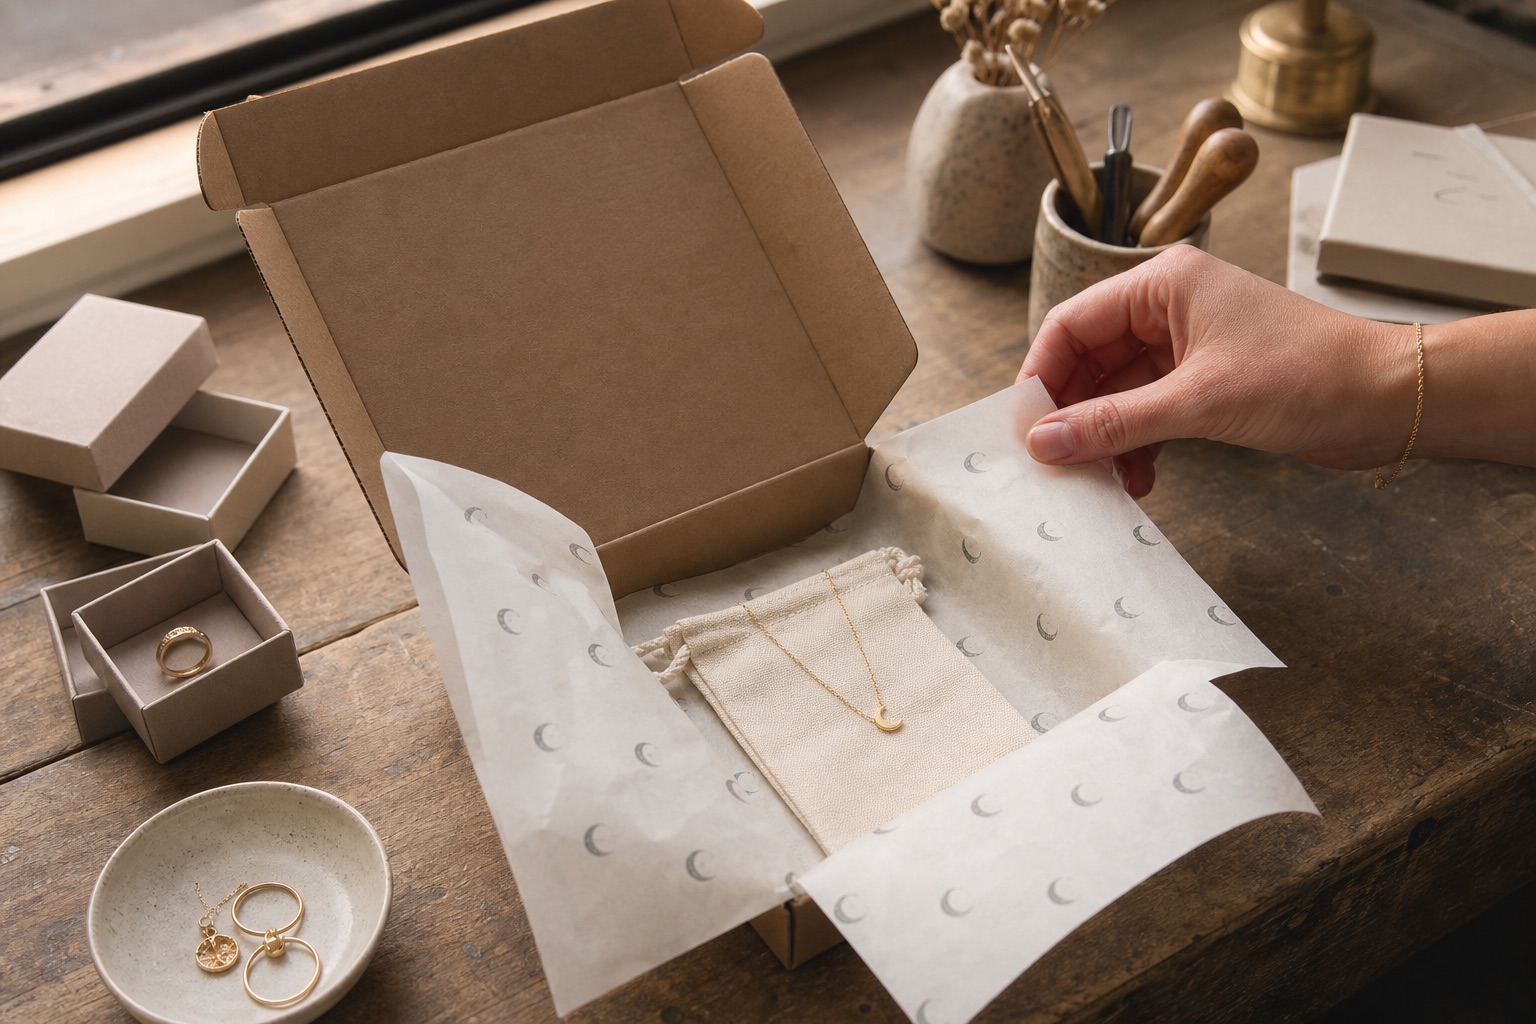
Jewellery packaging has to do several jobs in a very small space. It must keep pieces organised, protect delicate surfaces, feel appropriate to the product value and arrive without chains tangled or boxes moving around.
Custom tissue paper can create a clean branded reveal and a useful contact layer, but it should sit around a proper primary jewellery pack—not replace it.
The most effective system is usually restrained:
- Secure the jewellery on a card, in a pouch or in a fitted box.
- Use correctly sized tissue around that unit.
- Place it in a suitable mailer with movement controlled.
- Add only the information the customer needs.
This guide explains the tissue decisions inside that system.
What tissue paper can do for jewellery
Tissue can:
- Wrap a jewellery box or cotton pouch.
- Line a slim mailer.
- Separate multiple small boxes.
- Protect matte packaging surfaces from light rubbing.
- Conceal the product for a deliberate reveal.
- Carry a repeat logo across several box sizes.
It cannot:
- Stop a loose chain tangling.
- Hold earrings securely on its own.
- Prevent a heavy box moving in an oversized mailer.
- Guarantee silver will never tarnish.
- Protect fragile jewellery from crushing or impact.
Assign those jobs to cards, pouches, boxes, inserts and the outer transit pack.
Secure the piece before presentation wrapping
The jewellery should reach the tissue bench as a stable unit.
Necklaces
Use a card, pouch or box that prevents the chain moving freely. Fasten the chain through card slots or around a suitable insert. Check that the clasp cannot scratch the pendant.
Earrings
Use an earring card or fitted holder. Loose studs are easy to lose inside folds and can puncture thin tissue.
Rings
Use a ring slot, pouch or small box. Avoid relying on a stickered tissue packet for a high-value small item.
Bracelets
Secure the bracelet so it does not knot or rub against charms. A pouch may then be wrapped in tissue.
Pack the jewellery first; wrap the pack second.
Should jewellery tissue be acid-free?
Acid-free tissue is a sensible baseline where paper may remain in contact with jewellery, pouches and boxes.
It reduces one avoidable concern, but does not create a complete anti-tarnish system. Silver tarnishing is influenced by sulphur-containing compounds, air, humidity, skin residues and storage conditions.
For products expected to remain boxed for long periods:
- Use a verified acid-free tissue.
- Consider appropriate anti-tarnish components.
- Keep jewellery clean and dry before packing.
- Avoid unknown decorative papers.
- Test printed tissue against the actual finish.
- Give customers suitable care guidance.
Read our detailed guide to acid-free tissue paper for buffered, archival and colour-transfer distinctions.
Choose a sheet that respects the product scale
Jewellery tissue is often oversized. A 500 × 700mm sheet can engulf a ring box, create a thick bundle and hide the repeat logo.
Useful starting tests:
- 220 × 300mm: ring boxes, earring cards, small pouches.
- 380 × 380mm: necklace boxes, several small items, generous mailer liner.
- 380 × 500mm: larger presentation sets or multiple boxes.
Measure the packed unit and make a physical fold. The sheet needs enough allowance to travel over box height and overlap, but not enough to create eight layers under the lid.
Use how to choose tissue size for a product or box for the calculation.
Decide between a wrap and a liner
Wrap the primary pack
Wrapping a pouch or jewellery box:
- Keeps the reveal compact.
- Works across different outer mailers.
- Protects the primary box surface.
- Makes the tissue easy to remove as one unit.
Use a small envelope or diagonal fold.
Line the mailer
A tissue liner:
- Creates a larger branded surface.
- Holds several small boxes together visually.
- Opens in layers.
- Can be faster when products vary.
It does not stop boxes sliding. Use a fitted tray, insert or correctly sized mailer.
Use a top sheet
A folded top sheet provides branding without individually wrapping every item. This can be efficient for multi-item orders and retail presentation.
Test all three methods with the same product and compare time, sheet use and opening clarity.
Use a restrained repeat
Small tissue benefits from a pattern designed for small visible areas.
Start with:
- A simple symbol or compact wordmark.
- One dark print colour on white or warm-white tissue.
- A logo around 15–25mm for very small sheets.
- Enough space that one or two marks remain clear after folding.
- A non-directional or half-drop repeat.
A long strapline repeated every 20mm becomes texture rather than communication. Put detailed care information on an insert or digital page, not inside the tissue pattern.
Our repeating logo pattern guide explains tile construction and proofing.
White tissue or coloured tissue?
White or warm-white tissue
Advantages:
- Strong contrast with dark ink.
- Easier inspection for marks.
- Lower risk of dark dye transfer onto pale pouches or boxes.
- Works with most metal colours.
- Keeps the pack visually light.
Coloured tissue
Advantages:
- Strong brand palette.
- More dramatic reveal.
- Can distinguish collections.
Risks:
- Dark colour can transfer under friction or humidity.
- Pale ink may lack opacity.
- The shade can compete with jewellery and primary boxes.
- Several colours create extra inventory.
Test dark tissue against pale textiles, cards and coated boxes. If using white ink on black tissue, read the white ink printing guide before approving a screen mock-up.
Match the tissue to the metal and box
Packaging should support the product rather than mimic it.
Gold jewellery
Warm white, clay, deep green, charcoal and burgundy can work well. Metallic gold ink is not necessary simply because the product is gold.
Silver jewellery
White, cool grey, navy and black create clarity. Confirm any dark tissue is suitable for contact and storage.
Colourful jewellery
Use a quieter tissue palette so the product remains the focal point.
Mixed metals
Choose a neutral base and one established brand colour. Avoid creating separate tissue stock for every finish unless volume justifies it.
Look at the complete open box: jewellery, pouch, card, tissue and mailer. Colour decisions made in isolation often become crowded when assembled.
Tissue and anti-tarnish materials
Anti-tarnish paper, tabs or pouches have a specific functional role. Do not assume branded tissue provides the same chemistry.
A system may include:
- Jewellery secured on a card.
- Anti-tarnish tab where appropriate.
- Cotton pouch.
- Acid-free branded tissue.
- Fitted mailer.
Confirm that components are compatible and do not make unverified lifetime claims. “Tarnish-resistant packaging” needs evidence and conditions.
Protect polished and plated surfaces
Run a contact test:
- Clean the jewellery as it would be before dispatch.
- Wrap it in the proposed primary pack and printed tissue.
- Apply light pressure inside the final box.
- Leave it for a realistic storage period.
- Inspect for ink transfer, fibre marks and abrasion.
- Repeat under slightly humid conditions if relevant.
Test plated, lacquered, oxidised and soft finishes separately. A process suitable for solid metal may not suit every coating.
Avoid fragrance and contamination
Jewellery tissue should not be stored beside:
- Candles.
- Perfume oils.
- Cleaning chemicals.
- Food.
- Damp stock.
- Dusty polishing compounds.
Paper absorbs odour and moisture. Customers may be sensitive to fragrance, and residues can affect metal or packaging surfaces.
Keep tissue in its protective packaging, off the floor and away from direct sunlight.
Design the opening sequence
A clear sequence might be:
- Open the mailer.
- See one branded tissue fold.
- Lift or break one seal.
- Remove the secure jewellery box or pouch.
- Find care instructions beneath or inside the primary pack.
Avoid:
- Multiple hidden boxes.
- Loose cards falling out.
- Jewellery buried in shred.
- Stickers across several tissue layers.
- Tissue that must be torn to find a tiny item.
The customer should never wonder whether the jewellery has been omitted.
Include useful information
Jewellery buyers may need:
- Material and plating information.
- Care instructions.
- Sizing.
- Returns guidance.
- Hallmark information where relevant.
- Contact details.
Tissue is not the place for dense copy. Use a concise care card, box insert or QR destination that will remain available.
If a card adds no useful content, remove it. The tissue and primary box may already provide enough brand presence.
Gift orders
Jewellery is frequently gifted. A standard tissue wrap can support gift presentation without creating a completely separate packaging line.
Useful options:
- Customer message on a separate card.
- One neutral tissue design across normal and gift orders.
- A removable outer sleeve for special occasions.
- Gift receipts kept away from the reveal.
Avoid printing fixed seasonal messages on a large tissue run unless usage is predictable.
Returns and reusability
Jewellery returns are easier when the primary pack can be closed again.
Tissue itself may crease on opening, so do not make return eligibility depend on perfectly rewrapping it. Provide a pouch or box that secures the piece independently.
A clean opening with one seal causes less damage than several adhesive points.
Packing time and cost
Small items can still consume excessive labour.
Time ten orders and record:
- Seconds to secure the jewellery.
- Seconds to wrap tissue.
- Stickers used.
- Sheets used.
- Time to place inserts.
- Rework caused by crooked folds.
At 500 orders a week, an extra 30 seconds per order adds more than four hours of labour.
Use the tissue quantity guide to turn average sheets per order into a purchasing plan.
Transit testing
Pack the complete order and test:
- The jewellery remains secured.
- Pendants do not strike other parts.
- Boxes do not open.
- Primary packs do not move excessively.
- Tissue does not tear into the product.
- Mailer corners remain intact.
- Moisture cannot reach the jewellery under expected delivery conditions.
Tissue improves the reveal after the transit system has done its job.
Photograph the finished pack accurately
Jewellery brands often choose packaging partly for photography. Test how the tissue behaves in natural light before approving colour and repeat density.
Photograph:
- One flat sheet.
- The approved wrap.
- The first-open view.
- The jewellery beside the packaging.
- A single sheet over both light and dark products.
Tissue is translucent, so stacked sheets can look more saturated than the single sheet a customer receives. Avoid editing photographs until the paper colour becomes impossible to reproduce. Accurate product photography reduces disappointment and gives the packing team a realistic reference.
If customer unboxing content matters, make the opening easy to understand with one visible seal and a clear jewellery unit. A complicated bundle may photograph well before dispatch but frustrate the person trying to find and safely remove a fine chain.
Common jewellery packaging mistakes
Wrapping loose jewellery directly in tissue
Use a secure primary holder.
Using too much paper
Scale tissue to the product.
Claiming acid-free means anti-tarnish
They are not equivalent.
Choosing colour without transfer testing
Dark dye and ink can affect pale components.
Making the logo too small
Fine wordmarks disappear on small repeats.
Burying small items in shred
The customer must find the product immediately.
Overpackaging low-weight products
Several boxes and decorative layers increase postage and waste without improving security.
A specification checklist
Before ordering, confirm:
- Jewellery is secured before tissue wrapping.
- Tissue is verified acid-free for the intended retail use.
- Sheet size was tested on the actual box or pouch.
- Print colour has sufficient contrast.
- Logo remains legible at repeat size.
- Contact and rub tests passed.
- The mailer controls movement.
- Care information is accessible.
- Average sheets and packing time are known.
- Stock can be stored dry and fragrance-free.
Frequently asked questions
What tissue size is best for jewellery boxes?
Start with 220 × 300mm for small ring or earring boxes and test 380 × 380mm for larger necklace boxes or sets. Product height and fold style matter.
Should jewellery tissue be acid-free?
It is a sensible specification for contact and storage. It does not replace specific anti-tarnish materials or conservation advice.
Can I wrap a necklace directly in tissue?
Secure it on a card, in a pouch or in a fitted box first. Tissue does not prevent tangling.
Is black tissue safe for silver jewellery?
Do not decide by colour alone. Verify paper and dye specifications, test for transfer and consider long-term tarnish requirements.
How many sheets should a jewellery order use?
Many small orders use one correctly sized sheet. A liner plus separate wraps may use more. Pack ten typical orders to calculate the average.
The practical recommendation
Build the packaging from the jewellery outward: secure holder, suitable tissue, movement control and outer mailer. Use one small acid-free sheet with a clear one-colour repeat unless testing shows a reason for more.
For a small branded run, configure the size and logo online. For specialist paper, anti-tarnish questions or unusual finishes, send the team your product details.