Personalised Tissue Paper for Businesses: What You Can Customise
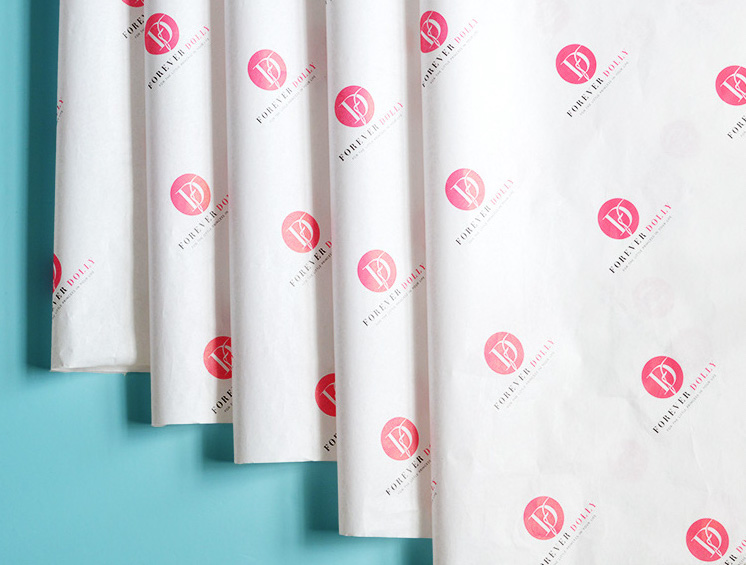
"Personalised tissue paper" means different things to different people. For a wedding it might be a couple's initials. For a business it almost always means one thing: tissue printed with your logo, in your colours, at a quantity that suits how many orders you pack.
This guide covers the business version. It explains every part of a sheet you can actually change, which decisions matter most, and how to send a brief that avoids a second round of proofs.
What can be personalised on a sheet of tissue?
There are five decisions. Get these right and the rest is detail.
- The artwork – usually a logo, sometimes a wordmark, icon or simple pattern.
- The layout – how often the artwork repeats and at what size.
- The ink colours – one colour, two colours or full colour.
- The paper – the weight (gsm) and the background colour of the tissue.
- The size – a standard sheet or a custom cut for your boxes.
1. Artwork: simpler prints better
Tissue is thin and slightly absorbent, so ink spreads a little more than on card. Bold logos with clear shapes reproduce well. Hairline details, tiny text and soft gradients can fill in or look faint.
A useful test: shrink your logo to the size of a thumbnail on screen. If you can still read it, it will usually work on tissue.
Vector files (PDF, AI or EPS) give the cleanest result. A high-resolution PNG can work for simple marks. Our artwork guide explains file set-up in detail.
2. Layout: repeat pattern or single logo?
Most businesses choose a repeating pattern. The logo appears across the whole sheet, so it shows wherever the tissue is folded or scrunched. A single large logo looks striking flat but can disappear once the sheet is wrapped around a product.
When choosing spacing, think about how the tissue will be seen. If it's folded once over a jumper, a looser pattern with bigger logos reads well. If it's scrunched around a candle, a tighter pattern makes sure the brand is visible. See our repeating logo pattern guide for examples.
3. Ink colours
- One colour is the most common choice. A single brand colour on white or coloured tissue looks clean and keeps cost down.
- Two colours suit logos with an icon and wordmark in different shades.
- Full colour (CMYK) is for multi-coloured artwork and illustrated patterns.
If your brand has a specific Pantone reference, include it. Colour on tissue will always look slightly softer than on coated paper, because the sheet is thin and the background shows through. Our Pantone matching guide explains what to expect.
4. Paper weight and background colour
Weight changes how the tissue feels in the hand:
- 17gsm is light and soft. It's the classic wrapping tissue used by most fashion and gift brands, and the most economical option.
- 30gsm is noticeably thicker and more opaque. It handles fuller artwork and feels more premium.
Not sure? A sample pack lets you feel 17gsm and 30gsm side by side. The samples are from previous print runs, so you're judging the paper and print quality rather than your own logo.
The background colour matters as much as the ink. White tissue with a coloured logo is the safe choice. Black or deeply coloured tissue looks bold but limits which ink colours show up; light inks often need white ink underneath. Read white ink on coloured tissue before choosing a dark sheet.
5. Size
Our standard sheet is 500 x 700mm, which suits most clothing and gift boxes. If you pack into a specific box size, a custom cut can reduce waste and folding time. Measure the inside of your box and how you wrap the product before deciding – the size guide shows how.
How many sheets should you order?
Our minimum order is 250 sheets, which suits a small brand testing personalised packaging for the first time. Larger quantities lower the cost per sheet, but only buy what you'll use before you next change your branding. Work out sheets per order and weekly order volume first – our quantity planning guide walks through the sum.
A brief that prints right first time
Before you order, have these ready:
- Logo file, ideally vector.
- Ink colour(s), with Pantone references if you have them.
- Tissue colour and weight.
- Sheet size, or box dimensions for a custom cut.
- Preferred layout: tight repeat, loose repeat or single logo.
- Quantity and the date you need stock in hand.
Every order gets a digital proof before printing. Check spelling, colour notes and logo spacing carefully at that stage – it's far cheaper to change a proof than a print run.
Next step
If you know what you want, the tissue builder lets you upload your logo, pick colours and see a preview with a live price. If your idea doesn't fit the builder – an unusual size, special colour or large run – request a quote and we'll come back to you directly.